Prepping My Vegetable Garden.
One of my favorite things about spring is getting to plant my garden! Fresh okra, tomatoes and cucumbers are unbelievably amazing. You can’t beat the taste of salad greens picked fresh from your garden or fresh salsa. The best part is knowing how it is grown and that chemicals aren’t used on it. In the past when I would try to plant my favorite vegetables I could never get it right. Soil, sunlight, water requirements…so many things to take into consideration. Until I came upon the square foot gardening method. Game changer. This makes it easy.
Basics of square foot gardening for high yields in small spaces.
The basics of this amazing raised bed garden method are:
- Plant in 4×4 boxes.
- Use special blend of ingredients for potting soil.
- Put six inches of this amazing raised bed soil in each bed.
- Section the boxes off into one foot squares.
- Plan your garden contents. Smaller, space saving vegetables can pack more into a square. Larger vegetables take a full square each, some need more than one square. So while an eggplant make take up a full square, you can plant nine bush bean plants per square.
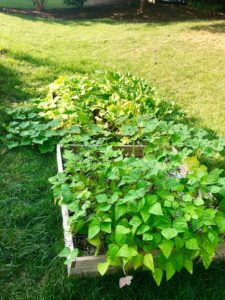
This is my third year using this method. I have learned a lot in the past two years about what works well and what doesn’t. Yet, I still have a lot to learn. This year I’m doing some things that I know works well, as well as doing a new experiment with tomatoes. I can’t wait to enjoy this year’s crops.
 But first? I had to dig in and clean those beds up! I had left some things in the beds over the winter. Now time to clean that gunk out and get my magic soil replenished. I had to dig out quite a few weeds. I also had some leftover vegetables from the fall that I pulled up. It was tempting to let them go but I decided I’d rather get a fresh start.
The Basics of Square Foot Gardening. Soil Preparation.
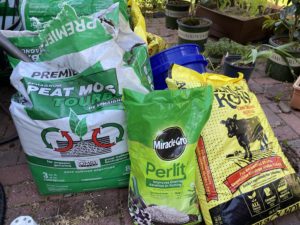 If you are one of those people that buys piles of gardening soil in the garden center in an attempt to grow your vegetables please stop. There’s a better way. The magic happens in the potting mix. Here is what you need: peat moss, compost (the more types you can get your hands on, the better), and vermiculite or perlite.
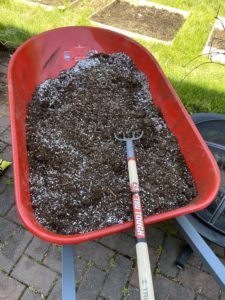
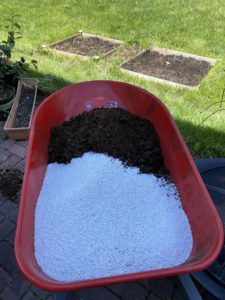 The magic potting mix is super easy. 1/3 peat moss, 1/3 compost and 1/3 vermiculite or perlite. In the past I was dipping it out with a pot and mixing it by hand which was tedious and time consuming. This year I bought a wheelbarrow and it became super easy and so fast. I just dumped each ingredient into a 5 gallon bucket, transferred it to the wheelbarrow and used a garden fork to mix the three together. This allows you to mix 15 gallons in just minutes.
In the prior two years I had been using perlite because it was easier to find. When Home Depot ran out, I decided to give the vermiculite a try instead. I have decided that just based on ease of mixing and the look in the bed, I prefer vermiculite. The perlite tends to float to the top when the soil is watered. I’m still new to the vermiculite but, so far, that isn’t happening.
How much potting soil mix do you need?
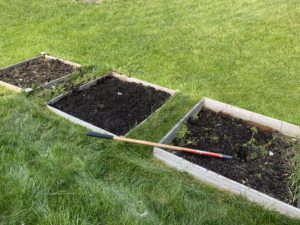
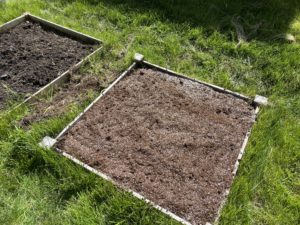 The original square foot method says you only need to have six inches of this awesome gardening potting mix in your square foot bed. A mistake I made last year was not refilling my bed from the prior year. My crops didn’t do very well. When I started prepping my beds this year, I figured out that bed was only six inches deep and it was maybe 1/2 to 2/3 full of potting mix when I planted last year. The bed on the left in this picture shows how the beds weren’t full. The one on the right is one that I replenished. That explains so much! I still got vegetables but nothing like the prior year when the boxes were full of garden soil.
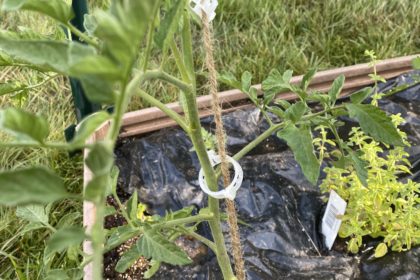
Use a weed barrier when you put your box down.
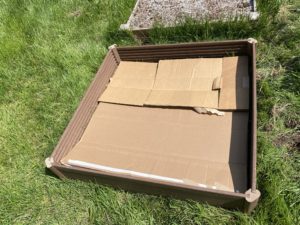 Weeds and grass are tough characters. Give your bed a better chance by putting down a barrier before you put your soil in. You will still get weeds as the summer progresses, but at least they aren’t growing from underneath the box. This will make them easier to pull. You can use a weed fabric, but I prefer just throwing some cardboard boxes down. That’s my go-to weed fabric! It’s not pretty, but it is super easy and it is a lot easier to put down on thick, lush grass.
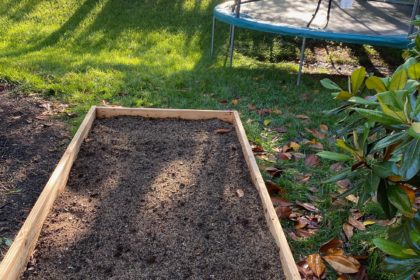
Fill your raised garden beds with your magic soil.
 After you have set your bed up and put down a weed barrier you are ready to dump in your mix! As you dump it in, make sure it’s mixed well and make sure the box has at least six inches. For my tomatoes this year I am filling my eight inch tall boxes up the rim. While the original recommendations say everything can grow in six inches of this soil, this year I am going eight for my tomatoes. I am determined to get a high yield this year. Tomatoes are my favorite and I’m pulling out all of the tricks this year.
This is just the first step for a successful high-yield harvest in raised beds. Buying seeds and planning what you are going to do in each square is a lot of fun. Follow along for more information on how to plan each square.