I had looked for quite a long time for the perfect dining room table before deciding to build a farmhouse table. I was amazed how hard it can be to find the perfect dining room table when you have such strong ideas about what you want. I searched long, far and wide. I literally looked for months and got exactly nowhere. Meanwhile every day I had to look at my 20 year old dining room table, with golden oak tones, that completely clashed with my new floors.
Well I’ll just build it!
I looked long and hard and just couldn’t find a reasonably priced solution. So in a moment of insanity, or wisdom depending on how you look at it, I threw my hands up and declared I was building my own table. Before I could change my mind I ordered my favorite table legs online and loaded my car up with the lumber I needed to get the job done.
I’m sure my family members were probably laughing at me, but knew better than to let me know it. What did I know about building a table? Absolutely nothing. But I’m great at researching and figuring out how to do something. I also crawled under the dining room table I already had and inspected how it was built. By the time I got my table legs delivered, I was educated and ready to go.
When I decided to build a table, I had absolutely no clue how to build a dining room table. Zero. I know when I brought the lumber into the house my family was probably laughing at me inside, just like I was laughing at myself. I really wasn’t sure that I would be able to see the project through to the end. But I love challenges, so I found myself sitting in the dining room floor surrounded by wood trying to figure out what to do first.
There were specific features I wanted to have in my new dining room table.
An imperfect dining room table? Yes, please.
There were several features that were important to me in a new dining room table. I wanted a farmhouse look. I wasn’t looking for polished or perfect. I wanted beautiful imperfection. I lived with a polished dining room table for years, it was time to move on.
My dining room table needed to fit a lot of chairs.
My family can fill up a table fast. We take up a lot of space. When we have visitors we didn’t want to have to squoosh in super tight anymore. Most of the tables I found supported two chairs on each side and one on each end. That wasn’t big enough. When everyone is home we take up seven seats. Add in the food and it kind of makes a six-seater frustratingly crowded.
I wanted my farmhouse dining room table to be extra wide.
I hate it when some of the food has to be practically on top of someone’s space. I wanted each spot to have plenty of space for plates and glasses, yet have plenty of room to put the meal on the table instead of leaving it in the kitchen. I also wanted it big enough to allow the girls to do their school work at the table with plenty of room to spread out. I was thinking extra-wide was definitely the way to go.
I didn’t want a brown farmhouse table.
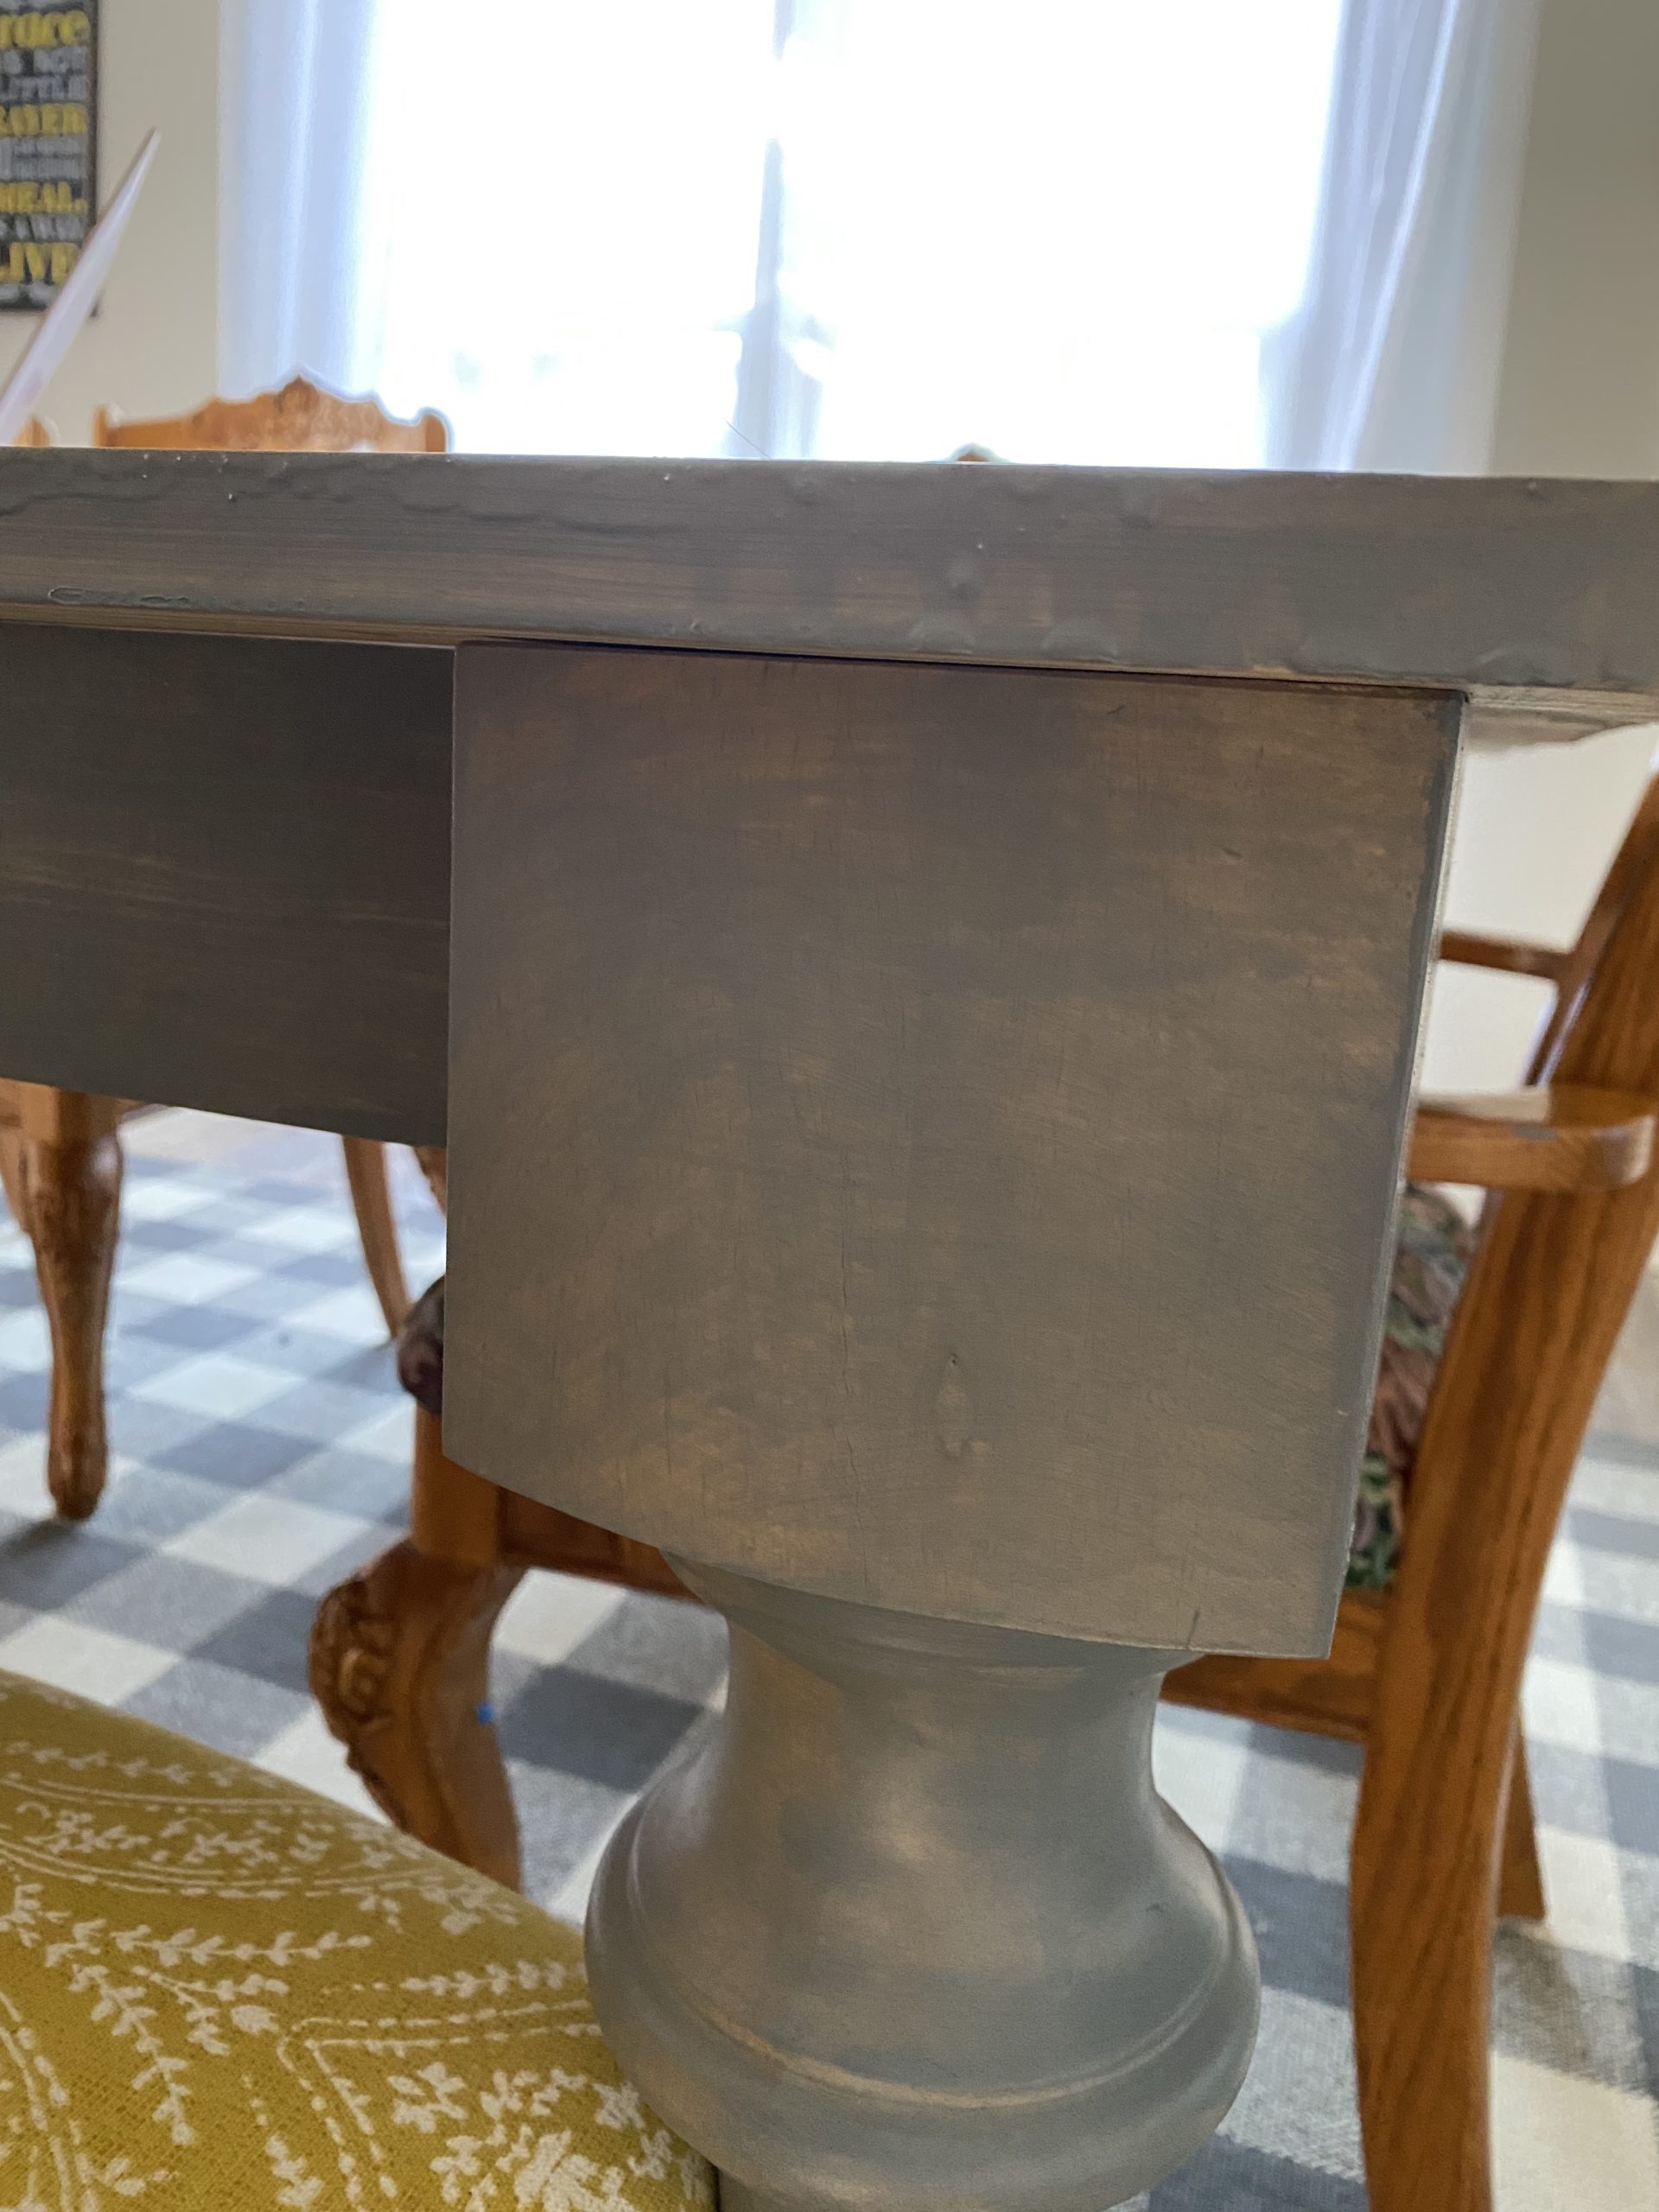
I had dark wood forever. Right now I’m really enjoying the softer look displayed by gray tones. I’ve been working to lighten up all of my furniture. Since my new floors have tones of gray, I wanted a gray farmhouse table.
I wanted interesting table legs on my farmhouse table.
For some reason I’ve always paid close attention to table legs. I don’t know why I have this obsession but I really do. I wanted the legs to have a cool vibe and be substantial. Plain, straight table legs weren’t going to work for my new table. Thin legs wouldn’t do either. I wanted my table to be solid. Skinny little legs, would look silly.
Building my farmhouse dining room table.
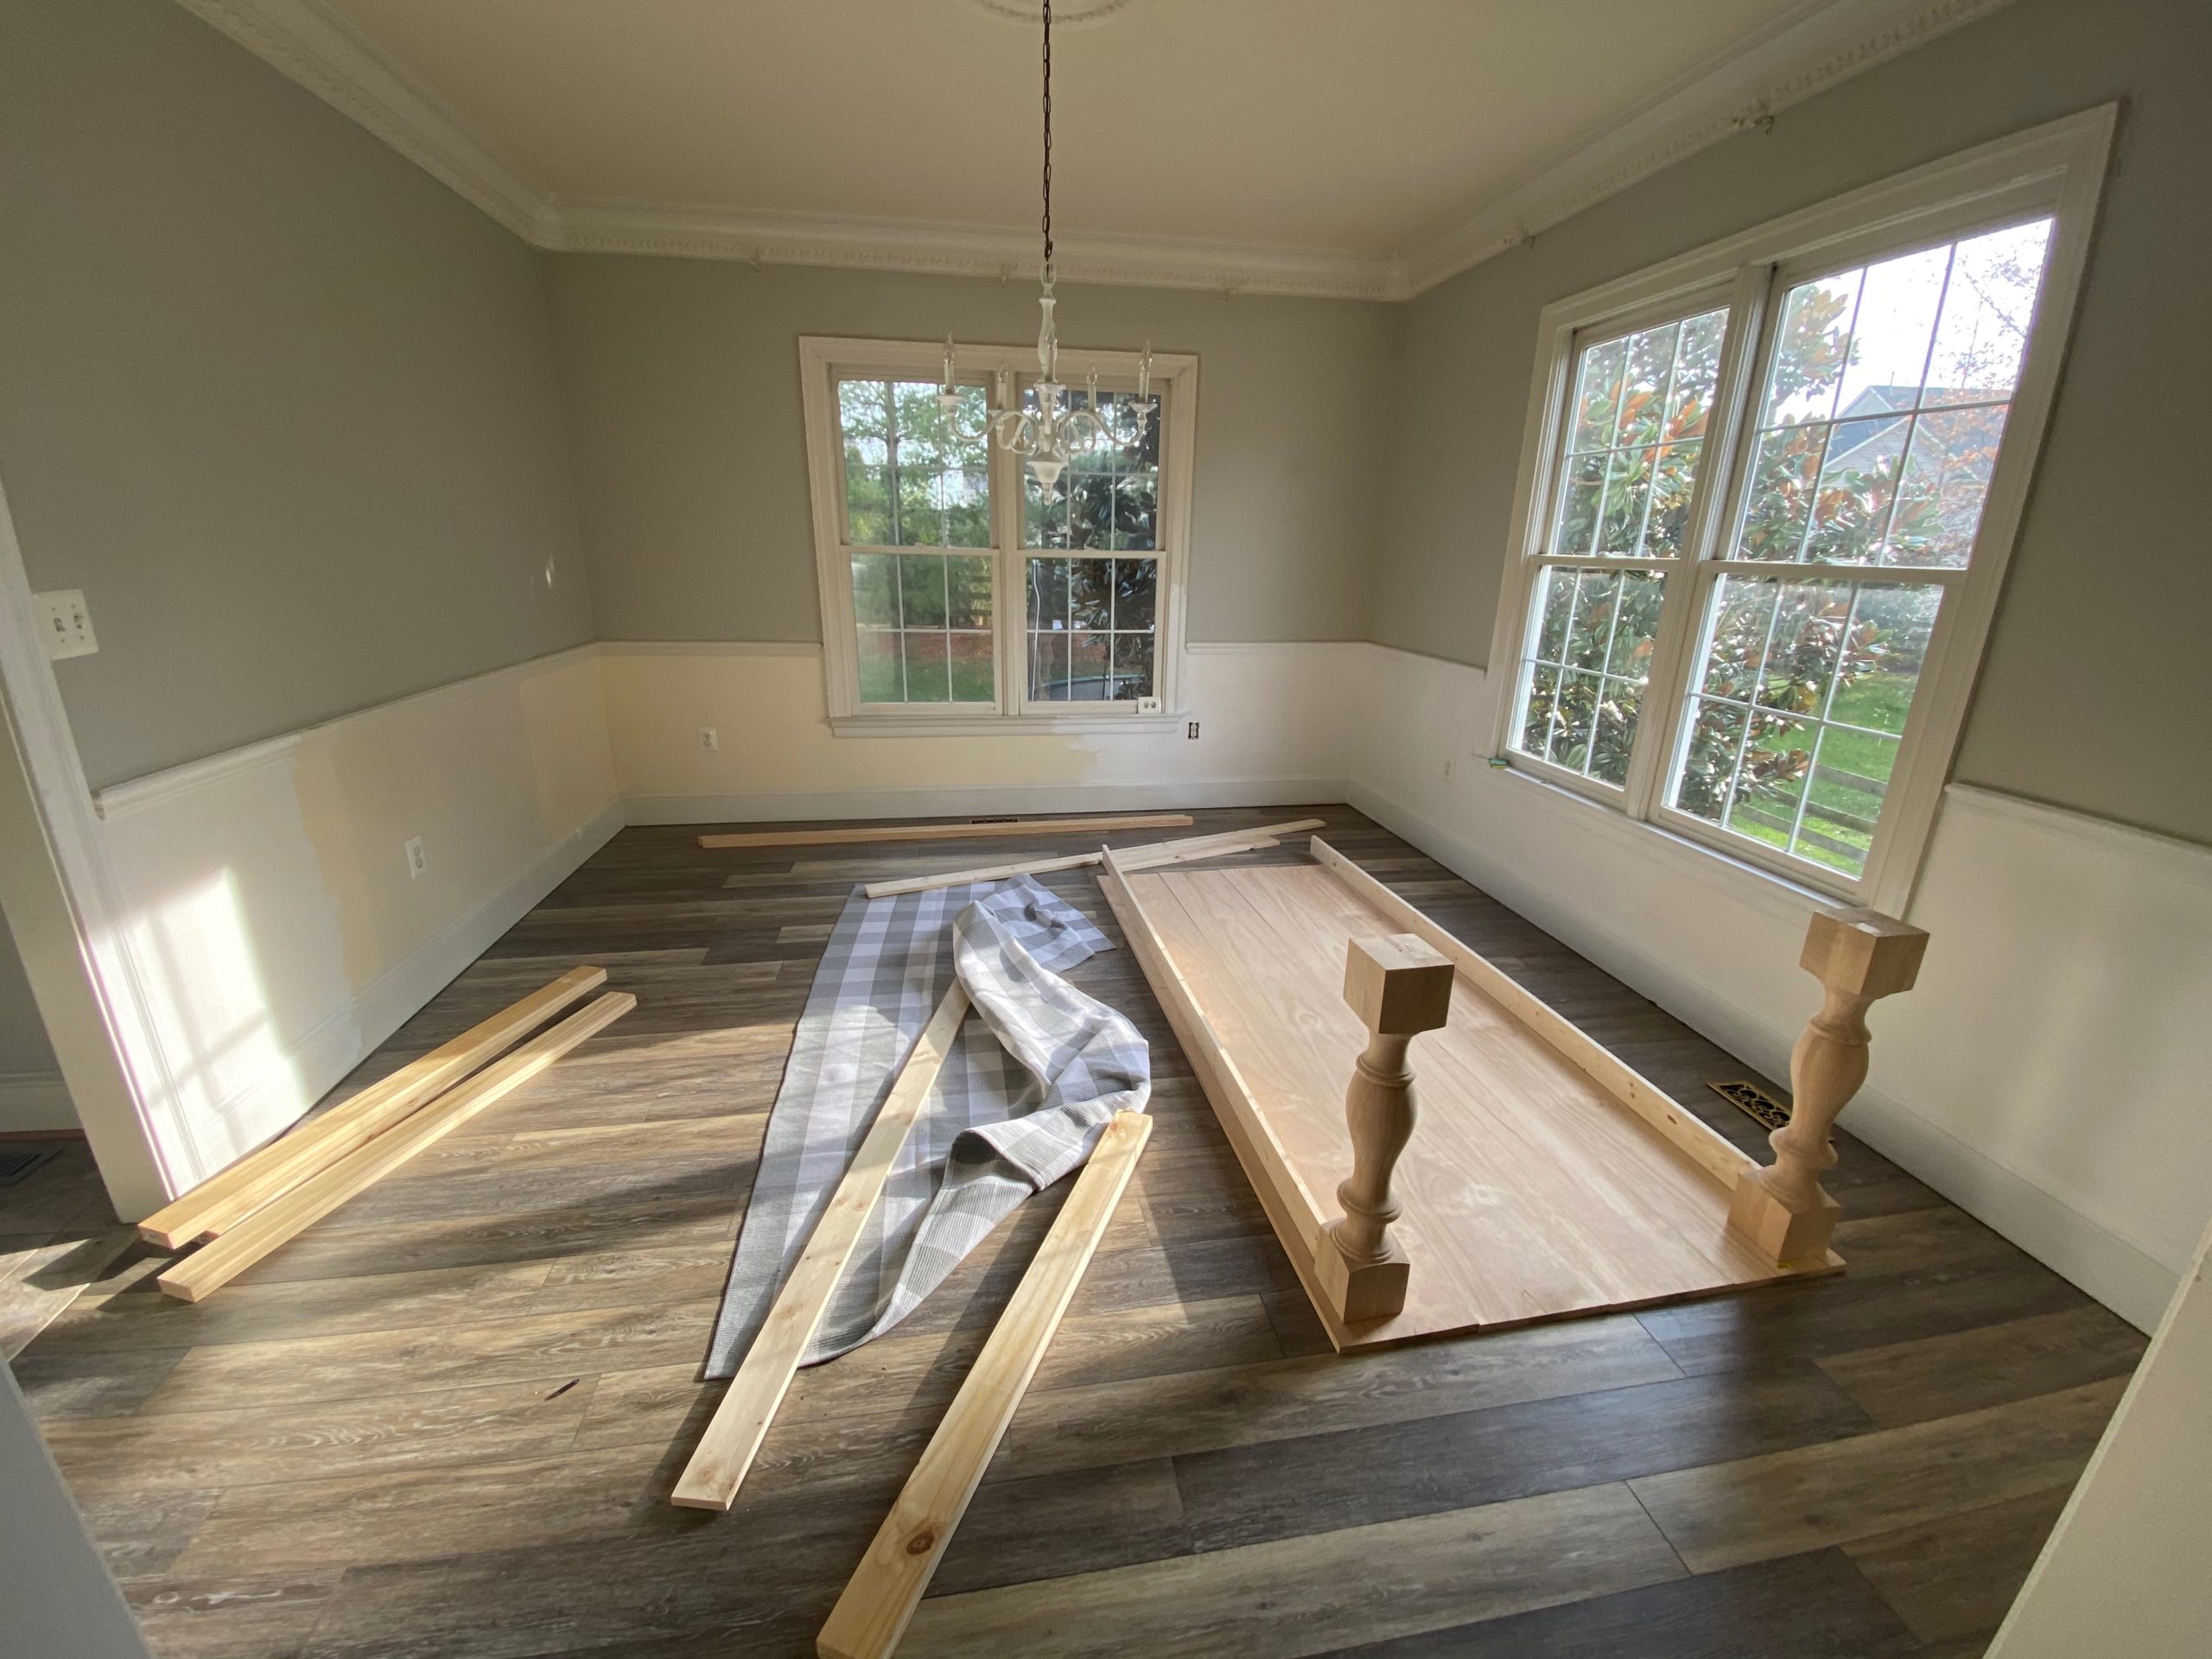 Before I put anything together I laid everything out on the floor. I wanted to make sure I knew what in the heck I was doing before I did it. At the point when I built the table I didn’t have a mitre saw, all I had was a jigsaw, so I bought the wood in the lengths I needed them. I used the jigsaw for anything that need to be shaved off or shortened at all. Not the best method, but the only option I had at that point and it can be done that way, although it’s harder than using a mitre saw. I mention this to let you know that you can build a table if you want, even without expensive tools.
Lay out your tabletop.
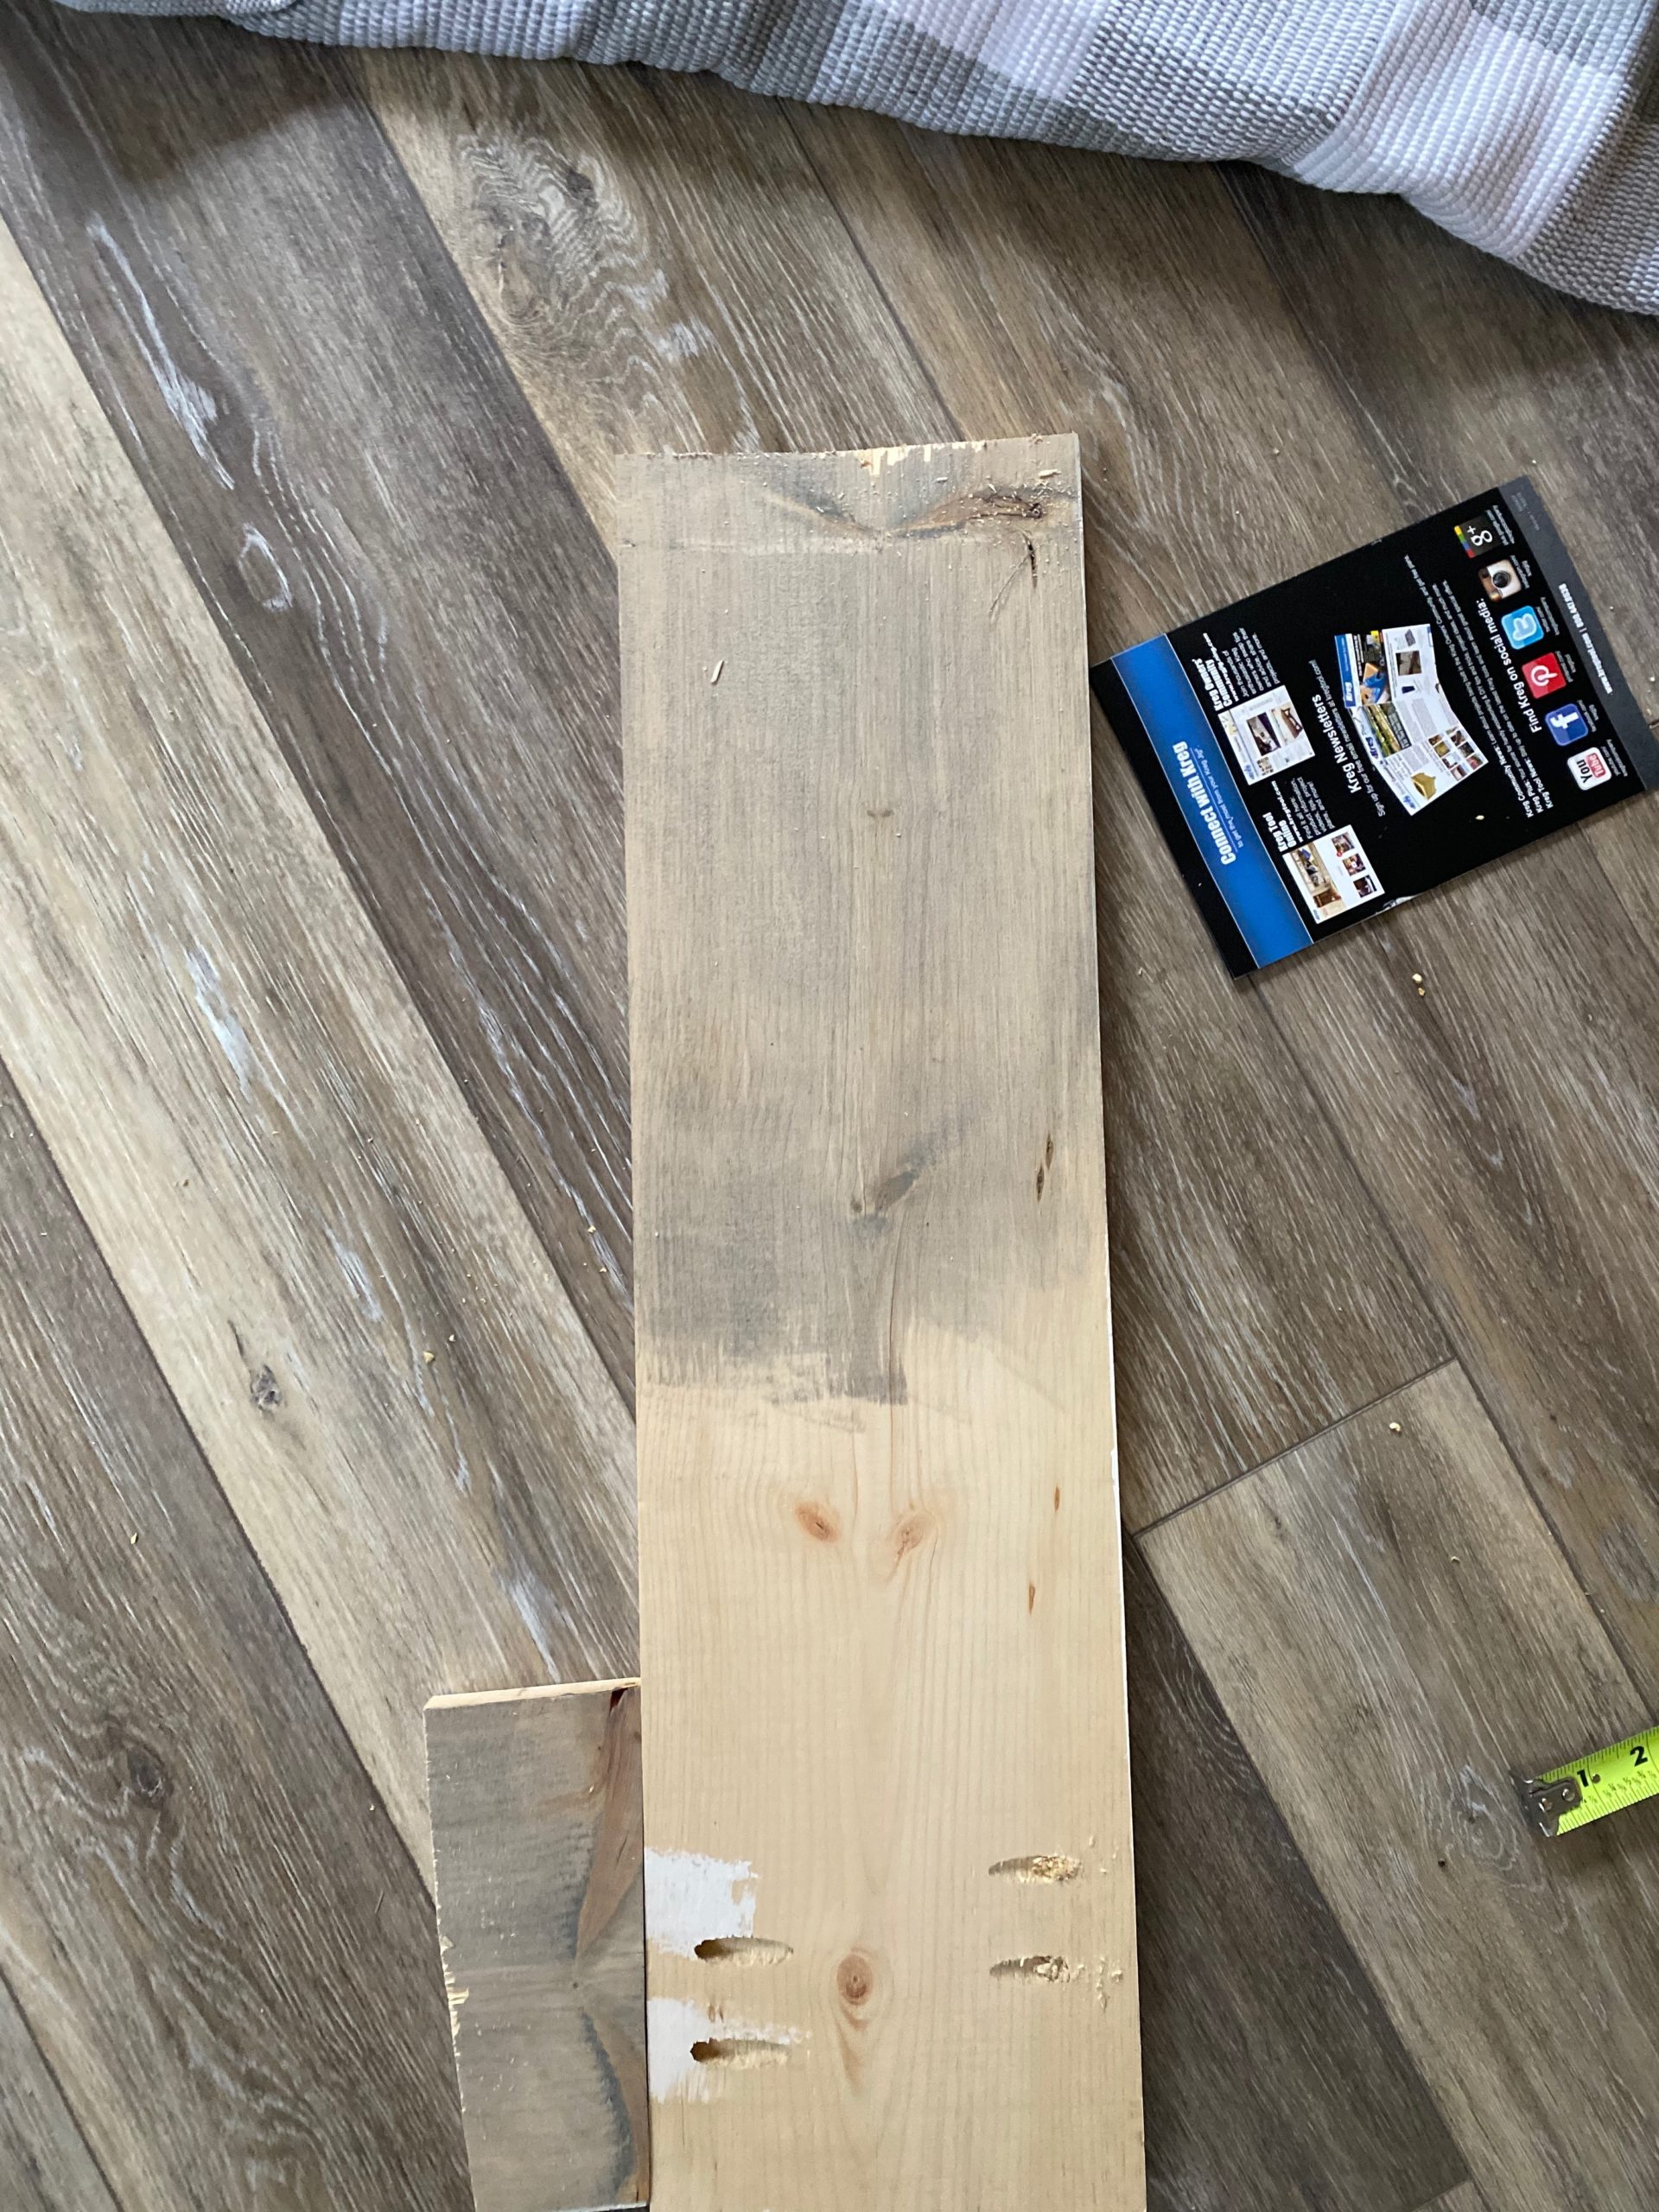
The first thing to do is lay out your tabletop. I chose to build my table with 5 1x12x8s. I didn’t want the tabletop super thick and heavy, so I went with 1″ thick boards. I think I could have easily used 2″ thick boards and would probably be as happy, but the 1″ boards are great and I don’t have any regrets.
 Because I wanted a wide table, I did choose to do the 12″ width on the boards so there were fewer joints. Now keep in mind 12″ width boards aren’t actually 12 inches wide. They are closer to 11″, so this means my table only ended up 56″ wide, not 60 inches wide. Just be aware of this and compensate for it if you are looking for precise measurements. There was actually a debate in the house about whether I should just use 4 boards which would have been around 45″ wide, but the concerns were all overruled because I wanted an extra wide table.
When you are laying out your tabletop, you want to be sure you are putting the boards in the order where they fit best. Because of the nature of lumber, some boards fit together much better than others. I spent about 30 minutes moving the boards around to find the perfect fit. I didn’t want awkward gaps in weird places. Had I not done this with the wood I purchased, the table would have looked like it wasn’t put together quite right.
Lay out your support structure.
 To help you visualize what’s going where, this is a very helpful step you don’t want to skip. When you do this, you can make sure the boards you purchased fit together correctly and make any adjustments you need to.
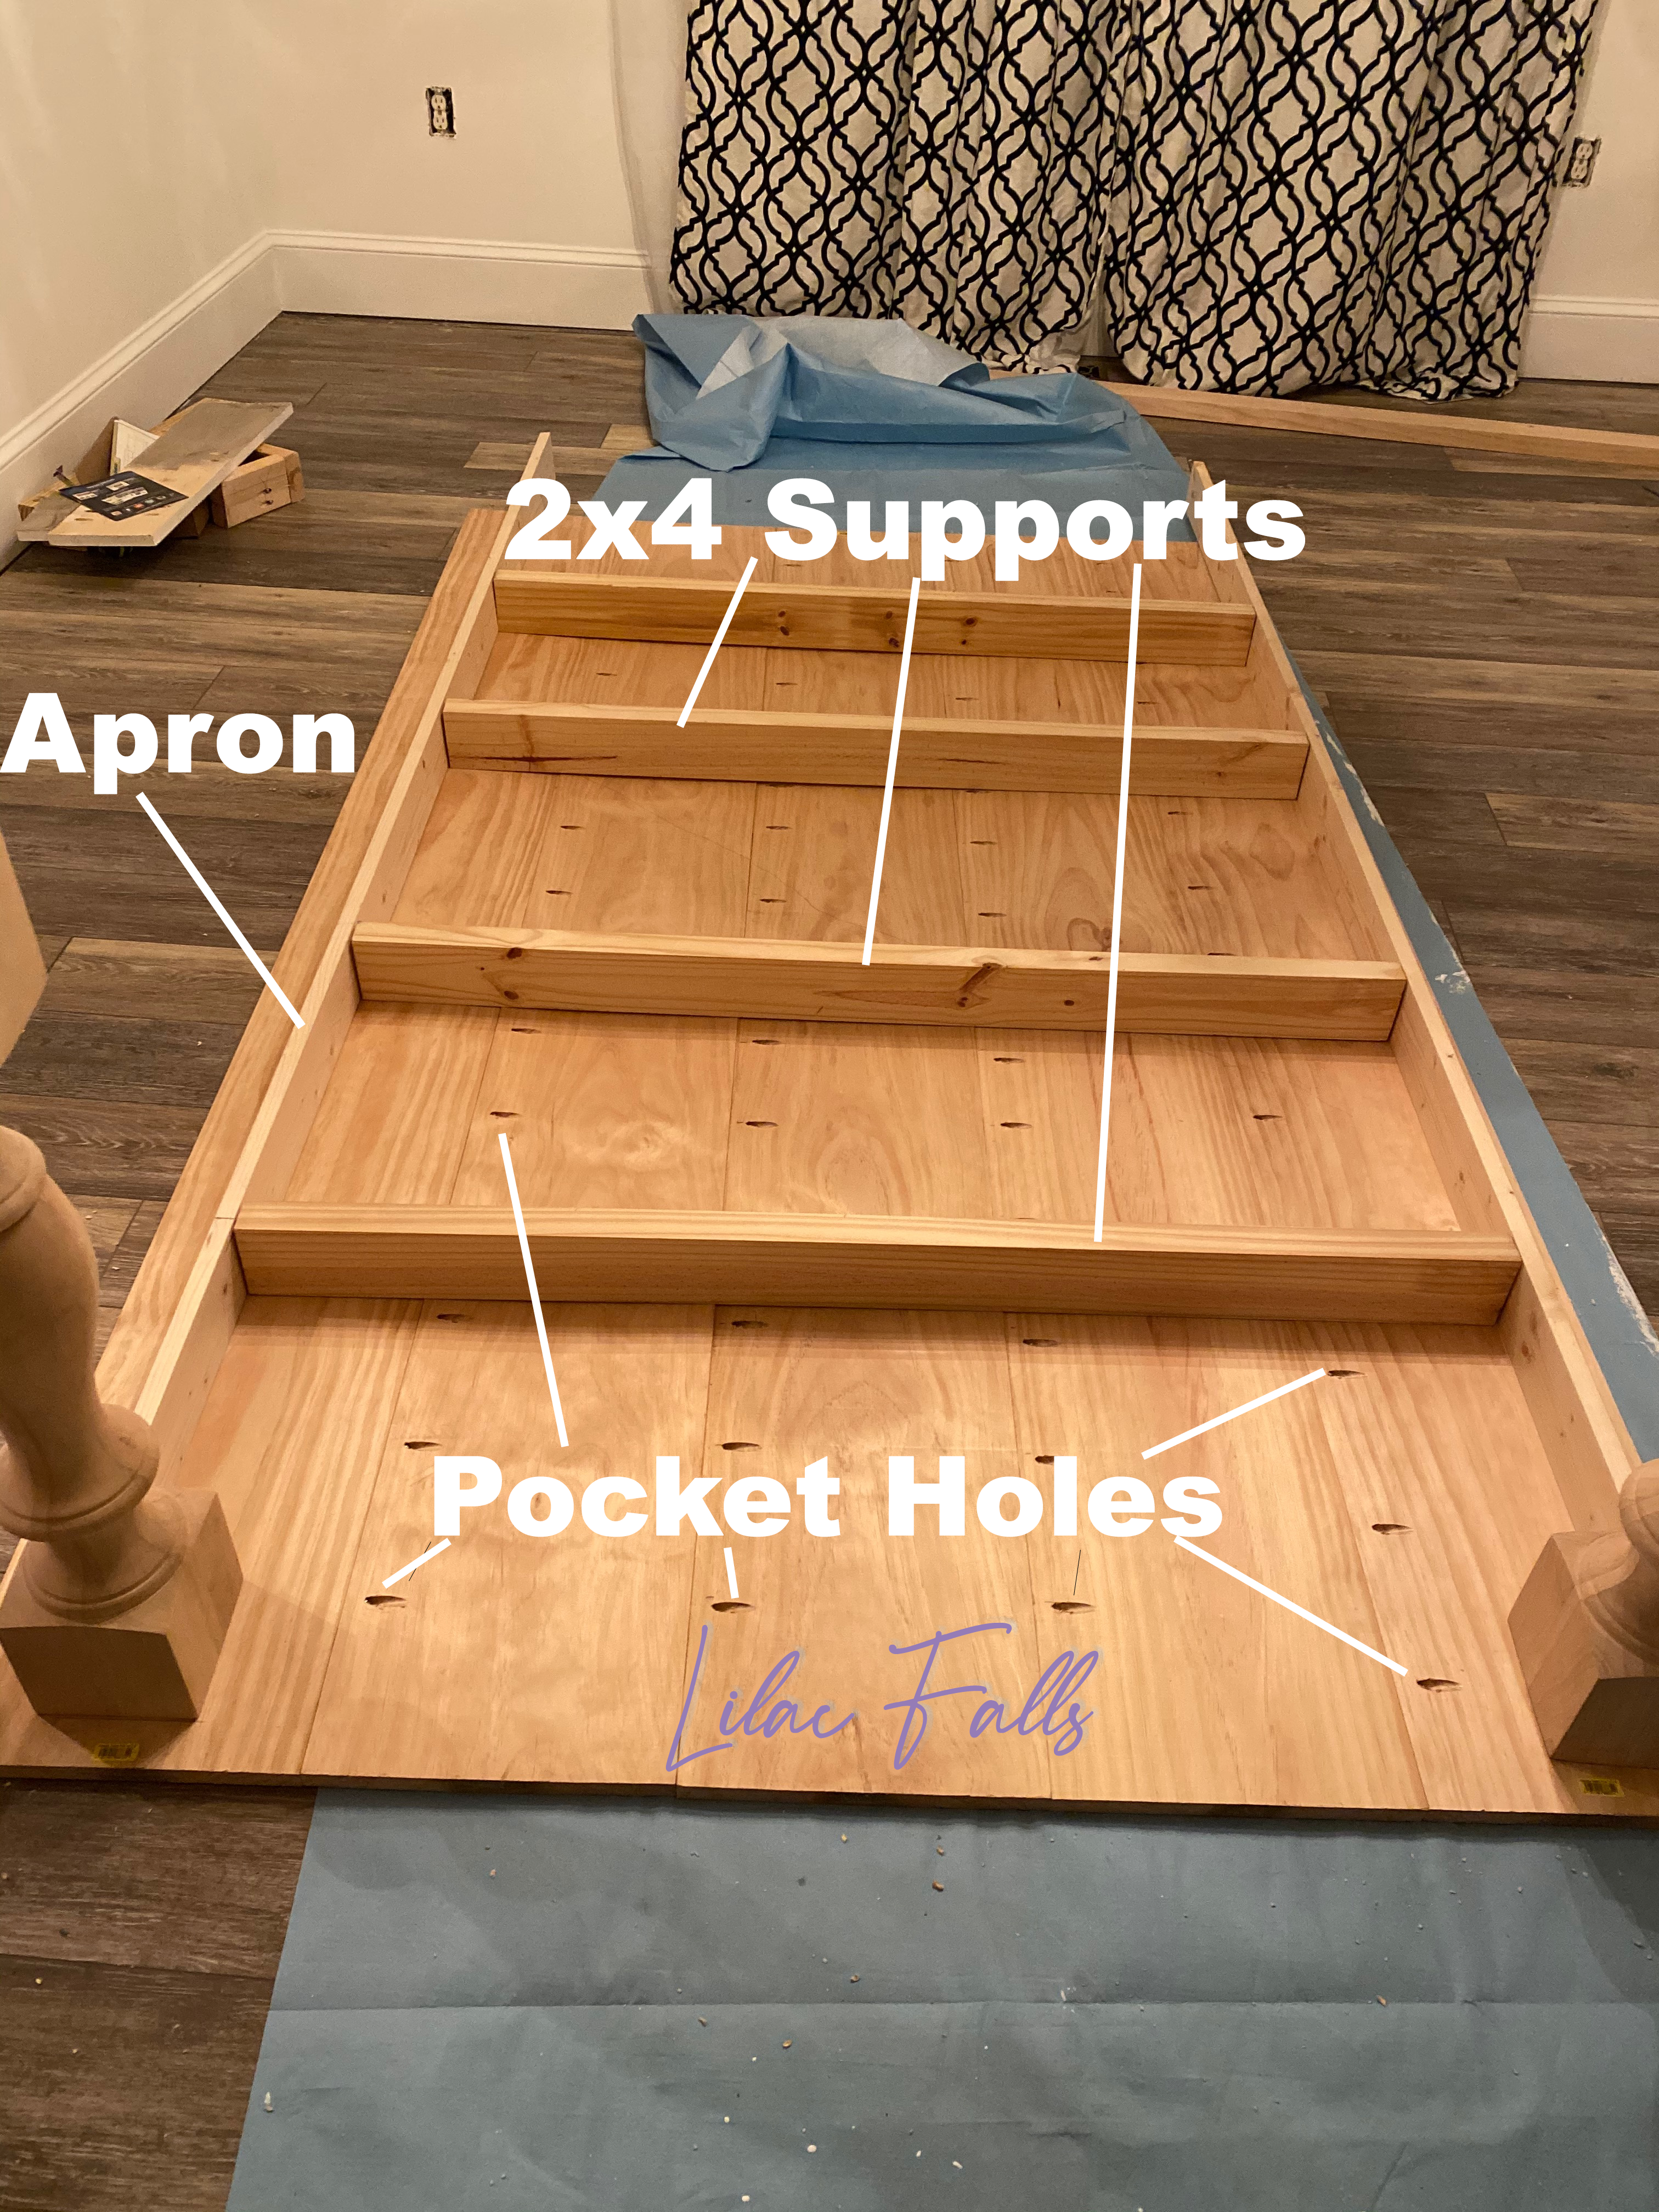
After you have arranged your table top upside down, then place the legs upside down on the bottom of the table top. Then you arrange your apron by laying out your 1x4s to connect the table legs. You will need an apron along the sides and on the ends so you will have a total of 4 aprons. The aprons will connect to the legs, 2×4 supports and the tabletop.
The aprons are the framework that pulls everything together when you are building your farmhouse table because they are attached to all of the components. When you lay it out in advance and see that everything is fitting smoothly, you avoid last minute problems and gaps and warps you didn’t anticipate.
Put together your tabletop with pocket holes.
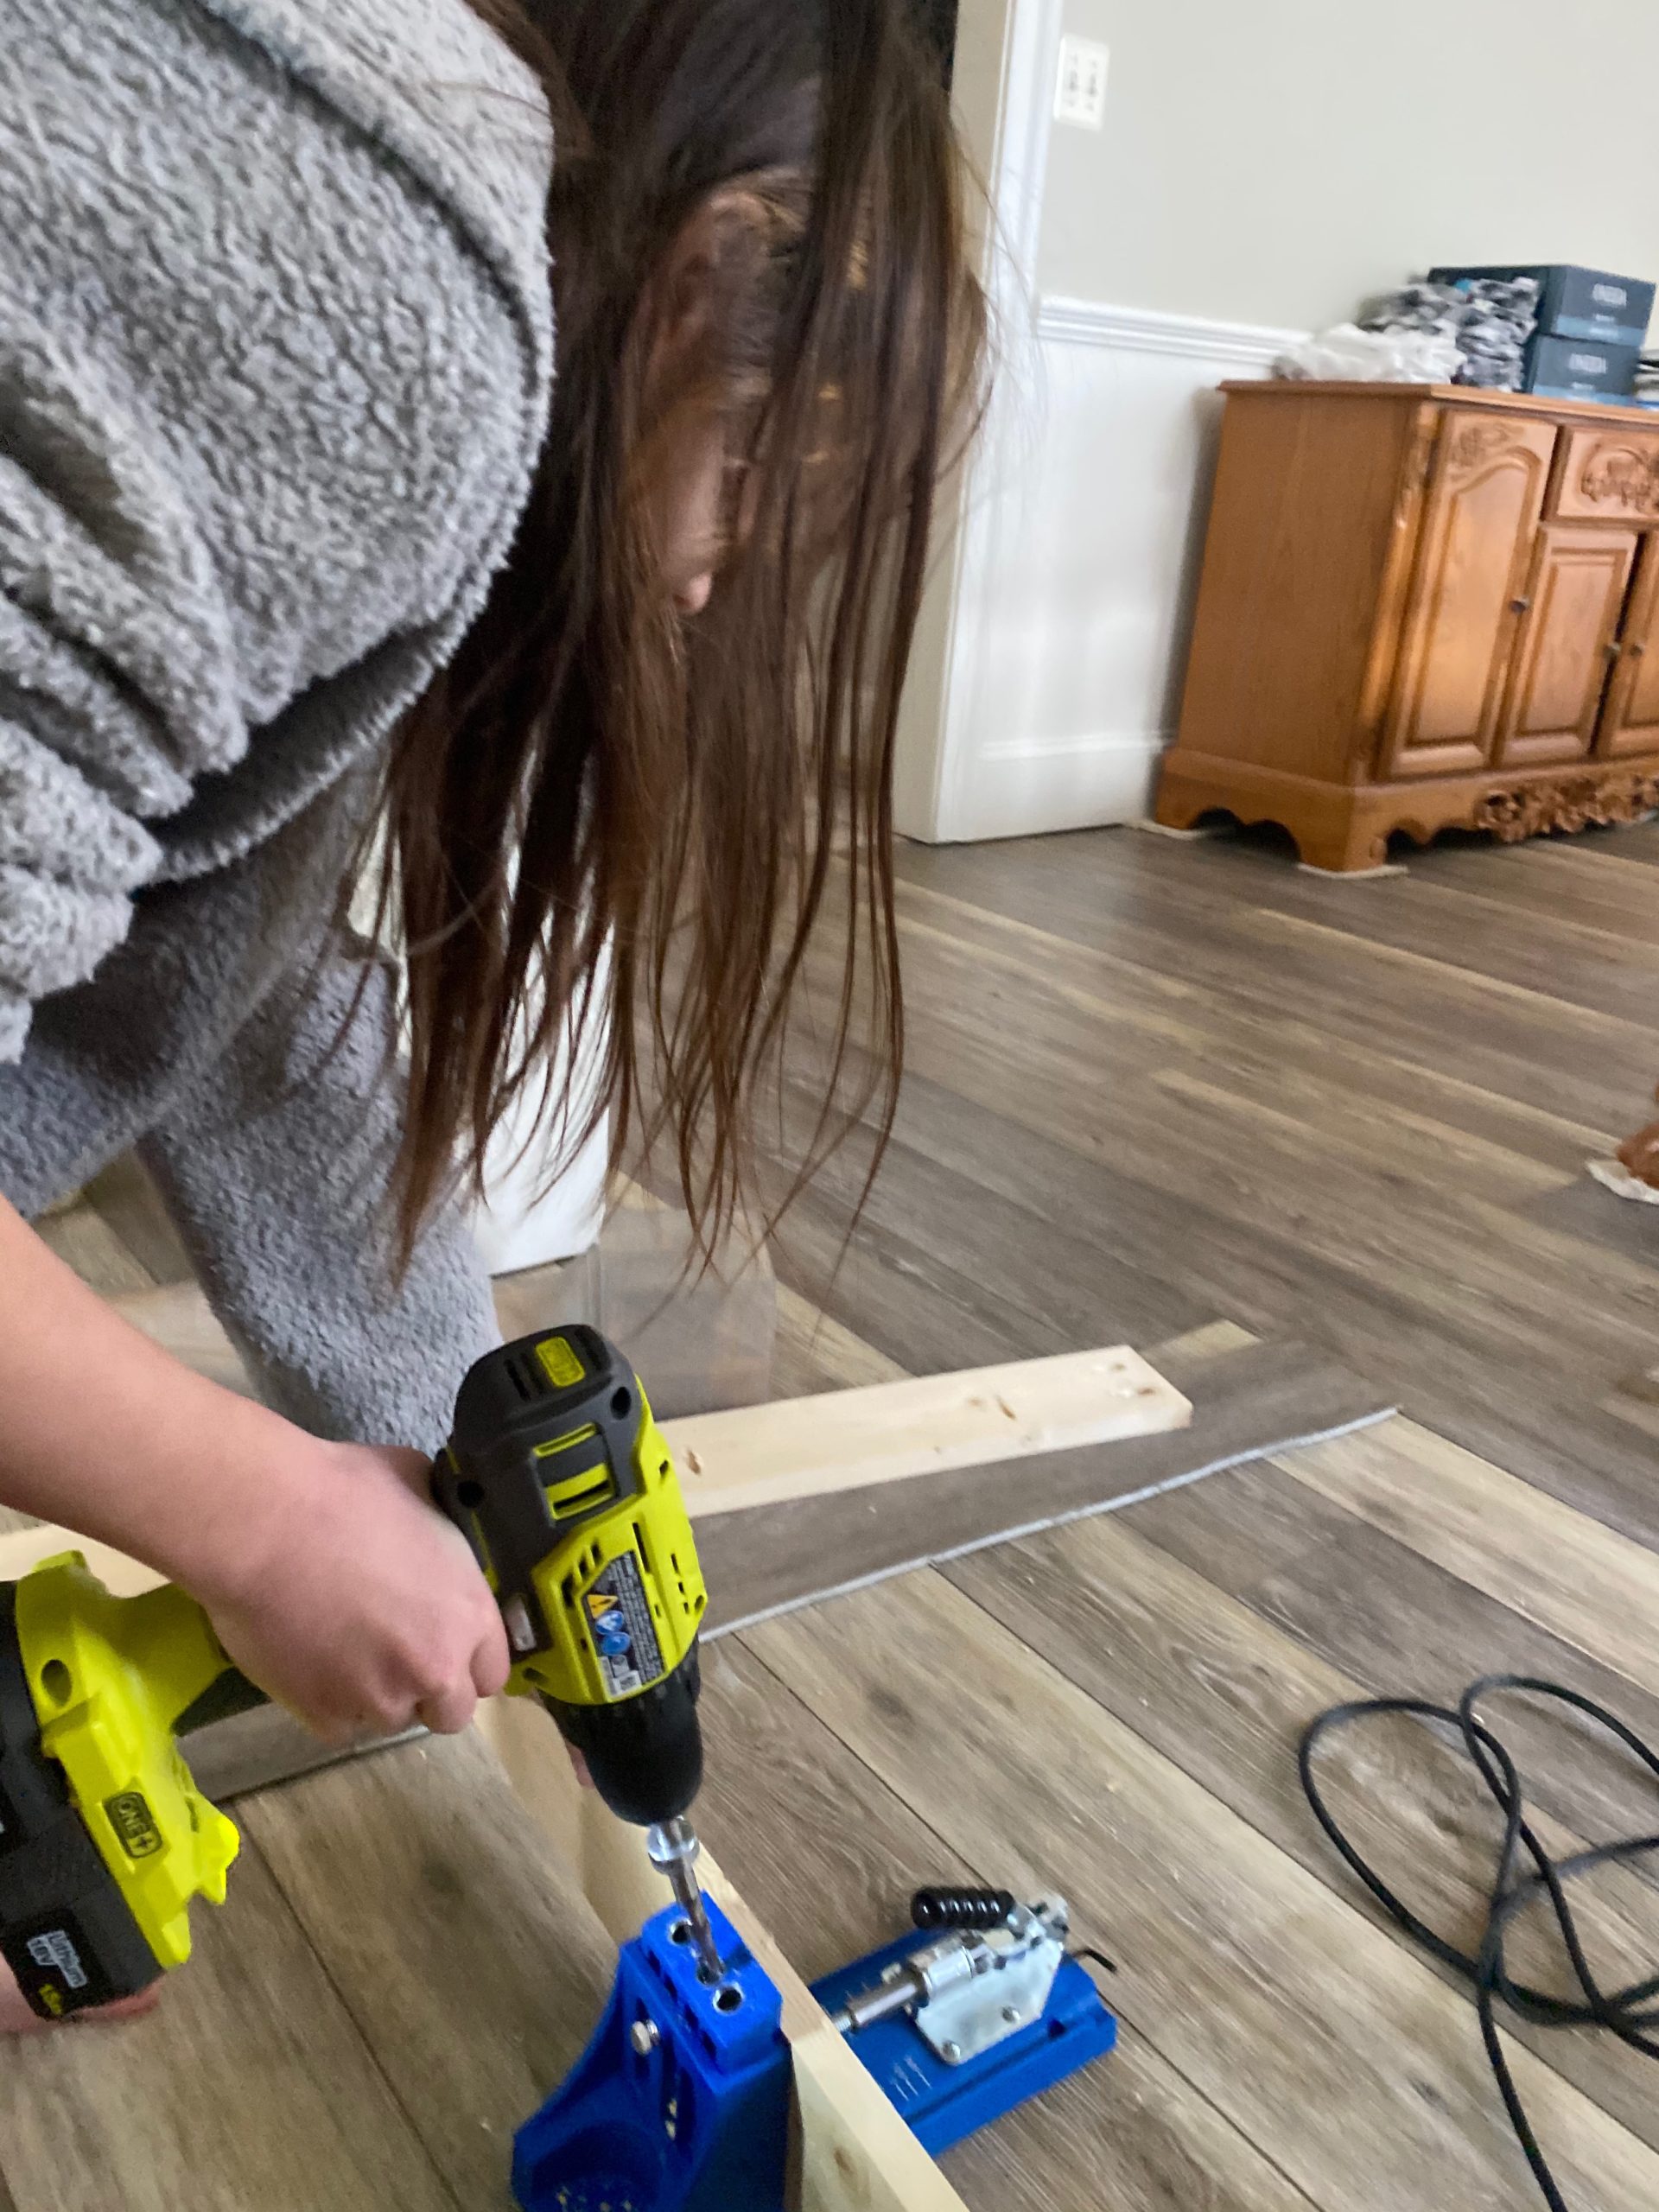 If you don’t have the Kreg pocket hole jig tool, get it. I absolutely LOVE this tool. It’s cheap, versatile, and after you have one you really won’t know how you ever lived without it. I bought the pocket hole jig tool specifically for this project and have found myself using it for so many things since then. It looks so much better to have hidden screws. Once you figure out how to use the Kreg jig it’s super easy. At first it was intimidating and I had a little trouble, but once you figure it out, it’s easy as pie. I even had my eleven year old drilling the holes.
I didn’t measure out my pocket holes, but I probably overkilled on my pocket holes for the table top. I definitely didn’t want any mishaps or table collapses. If you are just starting out with pocket holes do yourself a favor and practice on insignificant wood first. It might take a bit to get used to.
A big factor is getting your settings right. When you are dealing with a 1″ table top, that is actually only 3/4 of an inch thick, you need to make sure you are putting your screws in at the right angle so they don’t come out the top of the table. This did happen to me as I was attaching the table top so it is a real concern. I had both of my settings on the Kreg jig at 3/4″, and I was using 1 1/4 inch screws, but it’s still possible to get it too deep and have it pop through the top.
Attach the aprons to the table legs.
 Using pocket holes and screws, attach the aprons to the table legs. I had cut my aprons short enough to allow for a 1 inch overhang on each side of the table past the aprons and table legs. You may want to do more or less, it’s a personal preference.
Drill your pocket holes on the inside of the apron so they won’t be seen. When you do this step, also go ahead and drill pocket holes on the inside to attach your table top in your final step. You just want to do all of these pocket holes on the inside. I did this using two pocket holes per end of the 1x4s I used for the aprons. After you have all four legs and four aprons attached, it’s time to do the supports.
Add 2x4s for support.
Attach the 2×4 supports to the apron across the width of the underside of the table. I ran four 2x4s across the underside of the 8 foot table, and attached them to the side aprons using pocket holes.
 Because these supports won’t be seen and it’s to provide support, I placed pocket holes on both sides of the ends of the boards for extra support. Depending on the weight of the table, you may want to add more. The four supports is fine for my tabletop that is only 3/4″ thick. If I would have used 2″ thick boards for my tabletop I may have thrown in an extra support or two.
Attach the tabletop to the frame.
At this point your frame should be complete. You have attached the four aprons to the table legs and run supports from side to side. Now it’s time to attach the tabletop to the frame. You should have drilled your pocket holes already when you were prepping the aprons. Now you just use your 1 1/4″ pocket screws to attach the apron to the underside of the tabletop all the way around the table. When you are drilling the screws in you will want to pay attention to make sure you aren’t drilling so deep your screws come out of the top of the table.
If you do happen to screw one in too deeply, don’t panic. A little wood filler applied to the hole, then stained, will totally disguise it.
Stain your table.
 If you haven’t already stained your individual components, now is your time to shine. Stain stinks so be sure you have great ventilation. If you’d prefer, you can stain the individual boards outside before you put it together.
I quickly learned that staining is a lot harder than painting. I have a few splotches from uneven application, but now that the table is together I really feel like it adds to the charm. I used a Varathone stain that had the top coat already in it. I love this stain. It went well with my floors and I loved not having to separately apply a top coat.
Voila! I have the table built just the way I wanted it.
I have to say I am enjoying the heck out of my table! I don’t regret building my own farmhouse table at all. I’m thrilled with the results, even though when I started out I was completely unqualified. We use the table for all of our meals and I use it as a work desk as well, even though I have a separate desk. It really pulled the room together just the way I wanted it.