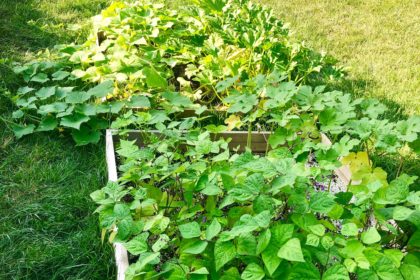
When I started out gardening, I had no idea how to build a raised garden bed. While I was convinced of the benefits, making anything was far above my knowledge and ability. So when I wanted to get started, I just bought those prefab raised garden boxes. As a result I have five different types of garden beds which kind of drives me a little bit crazy when I’m looking at them.
Building a Raised Garden Bed.
I’m here to tell you that you don’t have to do that. You can build your raised garden bed for less than the cost of a prefab box and then have a nice, uniform aesthetically pleasing raised garden for your veggie growing. I’m going to tell you exactly how to do it.
Plan your raised garden box sizes and visit the lumber store.
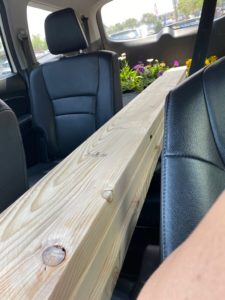
Go to your lumber store and find the 2x8x8 boards. This means the boards are 2 inches thick by 8 inches wide and 8 feet long. You just want plain wood, not pressure treated. You don’t want those icky chemicals from the wood leeching into your soil and veggies.
One 4 foot by 8 foot box requires 3 of the 2x8x8 boards. Many people prefer the 4×4 box size that the prefab boxes come in. I just added my first 4×8 box so these instructions on building a raised garden bed is for this size. If you just want one 4×4 box, you can just purchase 2 2x8x8 boards. Or if you would like a deeper box, you can purchase wider boards. The key is you don’t want to step inside your box so if you add a 4×8 you should make sure that you will be able to reach everything inside the box without stepping inside. Things can be packed pretty tightly inside a raised garden bed so these three boards can get you quite a bit of growing space.
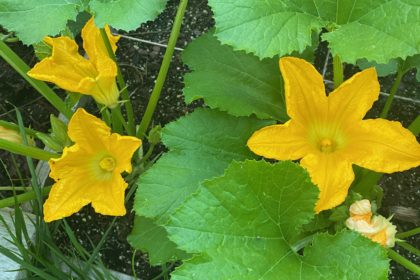
In my case, I wanted to add a large box in an area that gets morning sun, but loses it by early afternoon. I plan to put my greens here along with other vegetables that can get annoyed by the burning heat of the afternoon sun. Most raised garden boxes should be placed in full sun, but since I already have five in a full sun location, I want to add one in a shadier location so I can hopefully grow greens throughout the summer.
After you decide on the size of raised garden boxes to build, you can ask them to cut the boards in half that you need cut. If you decide to do a 4×8 box, then have them cut one of the three boards in half. If you want 4×4 boxes, have them cut them all in half. If you have a saw at home, you can do the cutting yourself if you prefer. I just made the cut quickly with my miter saw after I got home to make sure the boards were completely even.
Drill pocket holes.
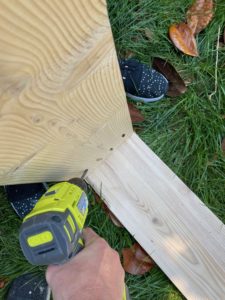
After you get home with your wood, place the boards in the spot you want to place your bed in. You can either put a screw into the ends to attach them together, or use pocket screws. I used 2’ pocket screws and attached mine on the inside of the corners so no screws are showing on the outside of the box.
I used my Kreg Jig to put the pocket holes into the inside surface of the two 4 foot boards on both ends. I did not put any pocket holes on the board surfaces pointing outside the box or on the 8 foot long pieces of wood.
Attach the 4 foot pieces to the ends of one of the 8 foot pieces.
After the 4 foot pieces both had pocket holes on both ends of the surface that will befacing inside of the box, I laid one of the long boards on the ground. I drilled the pocket screw into the wood, attaching the 4 foot piece to the 8 foot piece of wood making sure the corner is lined up perfectly.
After you do this, attach the other 2x8x4 foot piece of wood into the opposite end of the 8 foot piece of wood by drilling your pocket screws into the holes you’ve made on the inside surfaces on both ends of the board. I put 4 2 inch pocket screws on each end attaching to the 2x8x8s.
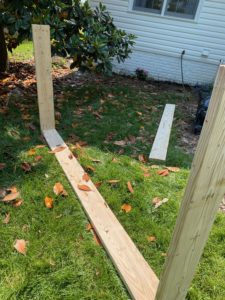
Flip the boards over onto the final 8 foot piece of wood and attach the 4 foot boards to this second 8 foot piece of wood.
You will need someone to help you with this step for sure. You are turning the 3 sides you have already attached upside down to attach the final side. You will need someone to help you hold it steady for you to drill in the final screws.
Flip the box into place, prep and fill.
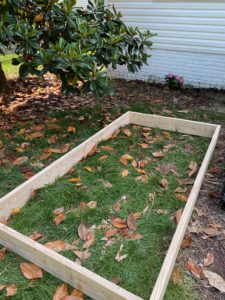
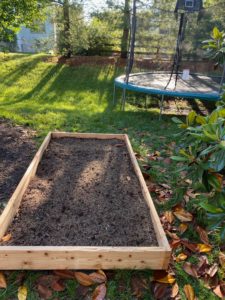
After all four sides are attached forming a box, you are ready to position your box and fill it up with potting soil. Now you have your first homemade raised garden box! Your basic wood raised garden bed purchased from a big box store will run you around $50 currently. The problem with these boxes is that many seem to be less than six inches deep. When you are planting in a raised bed, your minimum soil depth should be six inches so I would argue that many of the cheap boxes are not adequate. This large 8×4 box that I just built ran me around $40 and it is 8 inches deep. I could have easily purchased 2x10s instead if I wanted a deeper box.
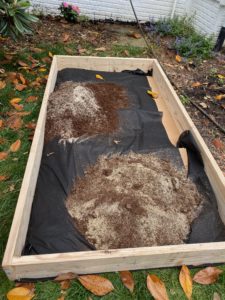
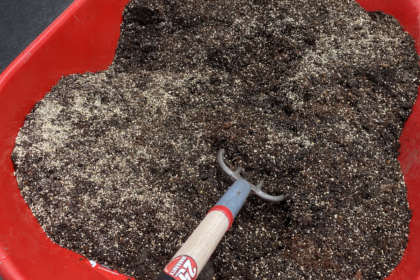
Since I put mine directly onto grass, I fill my inside with cardboard boxes after I’ve pulled off all of the tape and labels. I also try to use cardboard without printing and if it has a little printing, I put the printed side facing down. I will supplement it with weed fabric if necessary. For this raised garden bed, I didn’t have enough boxes so I used both. Then fill your bed with your potting mix of choice. I only use the 1/3 peat, 1/3 compost, 1/3 vermiculite combo for my boxes now. I’ve tested both ways, and feel like this mixture is far superior to the premixed raised garden soil I have tried.